Introduction to Atmosphere Cloud Computing
Atmosphere is one of the most versatile components of the CyVerse CI. Anything that you would normally be able to do with your local laptop/desktop, you can do on a virtual machine in the Atmosphere cloud. The advantage of using Atmosphere is that you can get access to greater resources (currently up to 16 CPU, 128GB RAM machines). Additionally, those resources are co-localized with the CyVerse Data Store so that moving to and from your instance is very easy to do.
How to launch and connect to an Atmosphere instance
Creating an Atmosphere instance is like buying a new computer, you will have to select what you want and then customize it to suit your needs. Also like a new computer, your Atmosphere instance will generally come only with the listed software installed. You will have to connect that instance to your CyVerse Data Store to import files. This guide will not cover all the use cases and features of Atmosphere (e.g. managing your allocation, requesting more resources, Imaging, and creating and mounting volumes). See the Atmosphere manual.
Tip: To use Atmosphere, you must have an email address from an academic/governmental institution and request access to Atmosphere through the user portal. To request access, login to user.iplantcollaborative.org and check to see if Atmosphere is listed under ‘My Services.’ If it is not, scroll down and click the “Request Access” button next to Atmosphere to complete a request form.
Launching an Atmosphere instance
- Login to Atmosphere
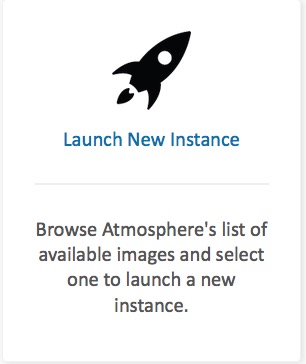
- Click Launch New Instance either on the navigation panel (left) or on the home screen.
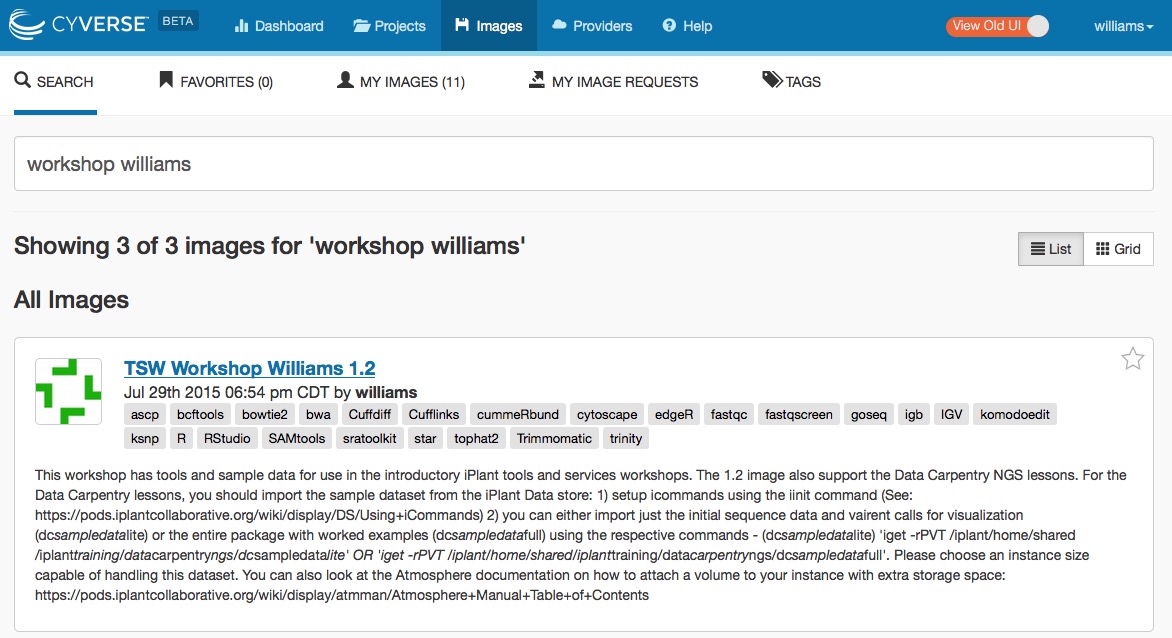
- In the search window, search and select the image you wish to use ( Note: some images support a GUI Desktop and some are only accessible through the shell – check the description and/or tags)
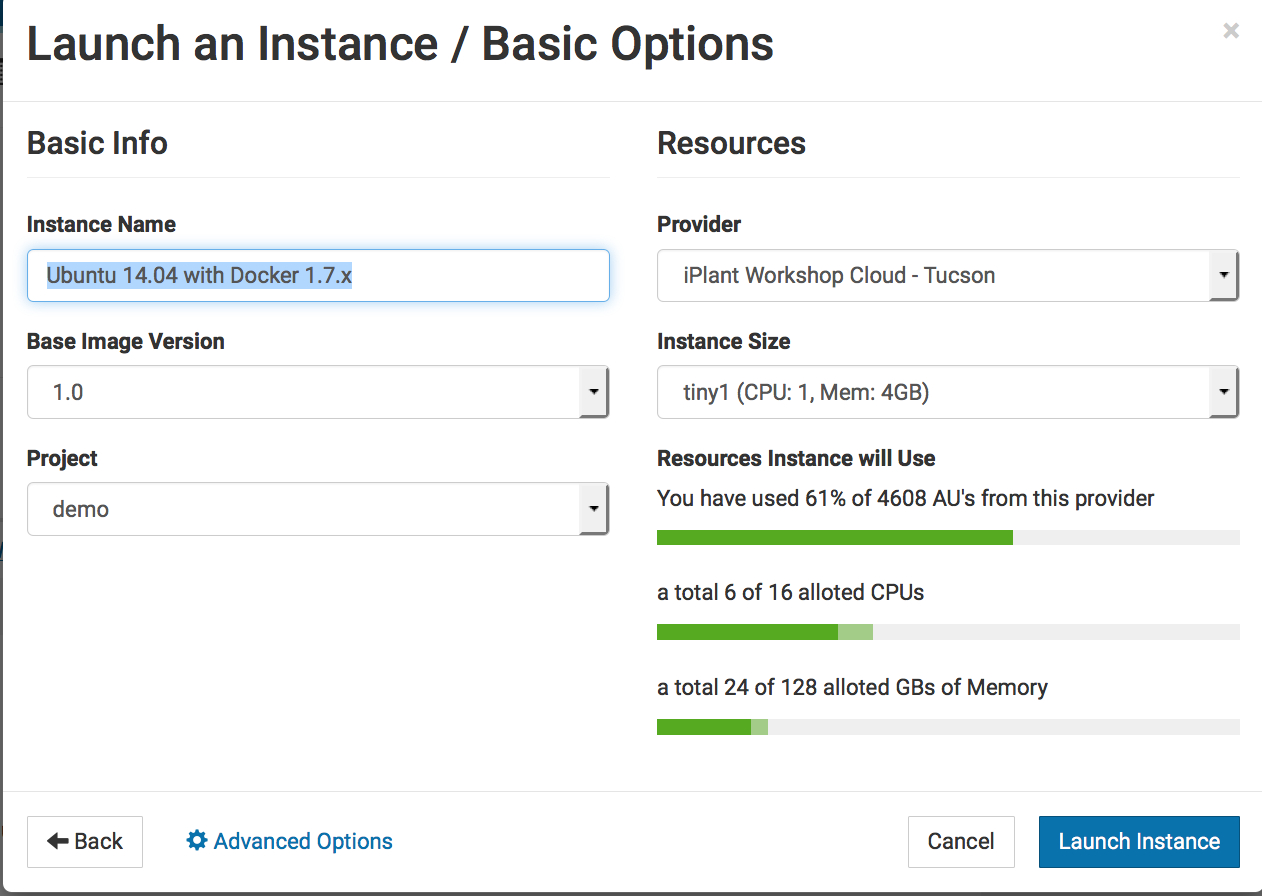
- Click Launch; during the launch wizard you may name your instance, select the cloud to launch on, the size of the instance, and a project to associate this instance with. If you do not have an existing project, you must create one during this launch. Follow the launch wizard through to the end and click ‘Launch Instance’. Your instance should be ready in 10-20 minutes.
Connecting to Atmosphere instance via SSH
Tip: Your Instance status must be ‘active’ in order for you to connect. Windows users can download PuTTY to connect via the terminal.
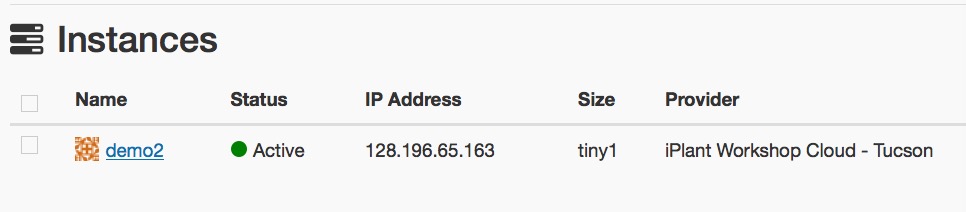
- Locate your Instance IP address in the Atmosphere control panel
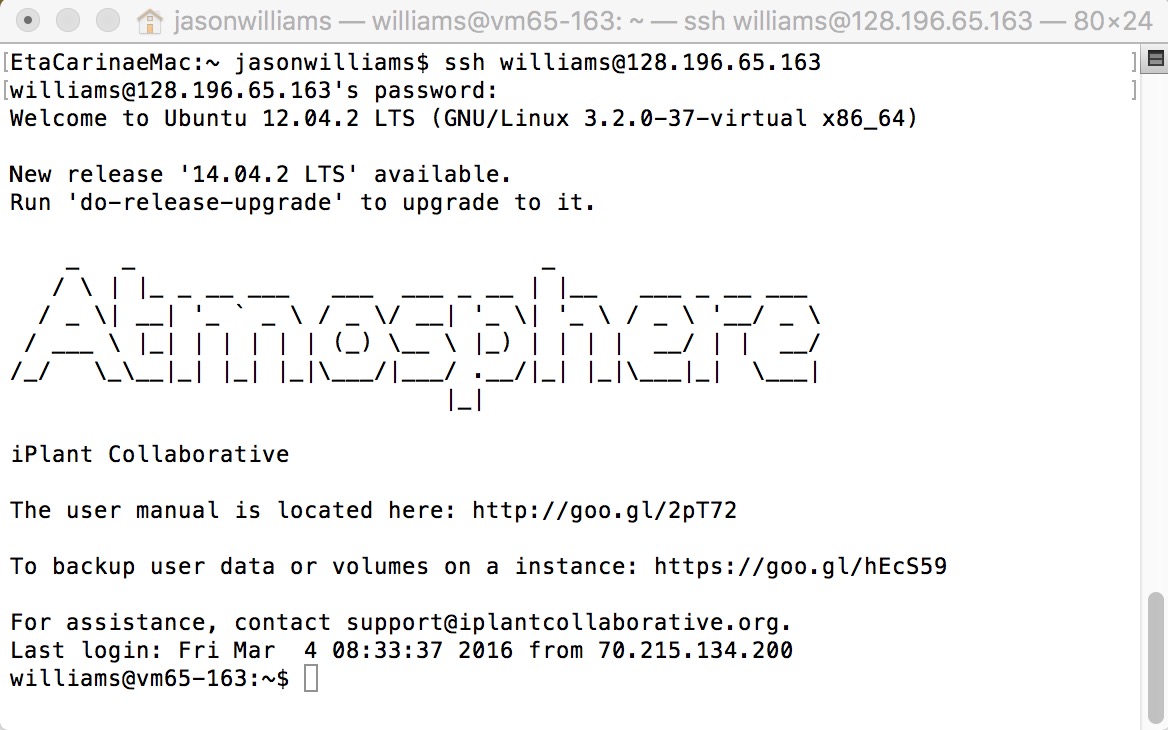
- Open a terminal (Mac/Linux) and connect
$ ssh your_cyverse_username@cyverse.org - You will be asked to save and RSA key to the list of known hosts, enter ‘yes’
- When prompted, enter your CyVerse password.
Connecting to Atmosphere instance via VNC
Some Atmosphere images also are configures with a desktop interface. This can be accessed using a VNC Viewer. Download VNC Viewer from Real VNC to connect to your instance.
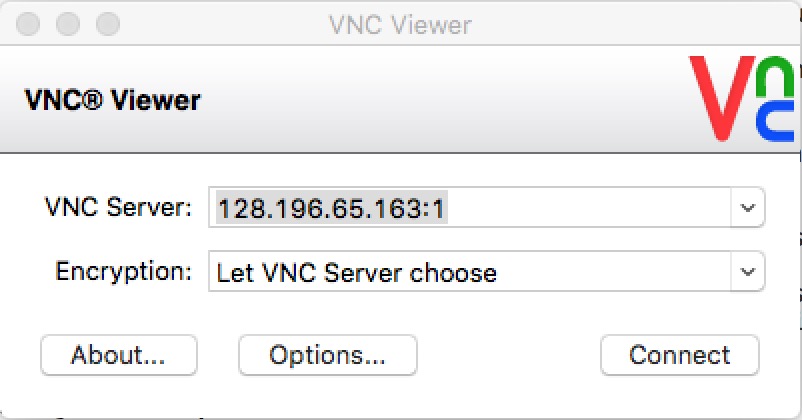
Tip: When you download VNC viewer, the program will ask for an IP address. This IP address is available from the Atmosphere website; log into Atmosphere and locate the IP address of the instance you wish to connect to.
- Locate your Instance IP address (next to your instance name)
- Enter your IP address + “:1” in the ‘VNC Server’ field (e.g. 161.803.39.887:1) and click connect.
- When connecting for the first time to an instance, you will be prompted to save a signature. Select yes and continue; you will then be connected to your Atmosphere desktop.
Terminating your Atmosphere instance
When you are finished with your instance, you must terminate. Follow the following steps.
- If necessary, sign into Atmosphere: http://atmo.iplantcollaborative.org/
- Locate your instance (e.g. select 'Projects' and then select the project that contains the instance you will terminate.)
-
Click on the instance name to get to the 'Actions' menu. You may then select the 'Delete' button to terminate the instance.
Warning: This will delete any data on this instance, so you must move any data you wish to save off the instance (for example by using iCommands). 5. After reading the warning and confirming you are ready, click 'Terminate' to terminate the instance.